Modifying a Xiaomi Zigbee Button

Posted on 2019-02-05 in makes

In late 2017, i was fiddling around trying to teach myself fusion 360, and accidentally found myself designing a giant red button. I didn't really have a use for it at the time, so i added a microswitch, printed it out, and had a random giant button sat around in my office, mostly getting in the way.

The Button

Fast forward a bit, and i've implemented a home automation system with a zigbee network, and a £5 Xiaomi Aqara Zigbee button. This button is around 5cm x 5cm, battery powered, and as far as I can tell lasts for infinity time from a single coin cell. I can't help but think though... what if it was giant instead?

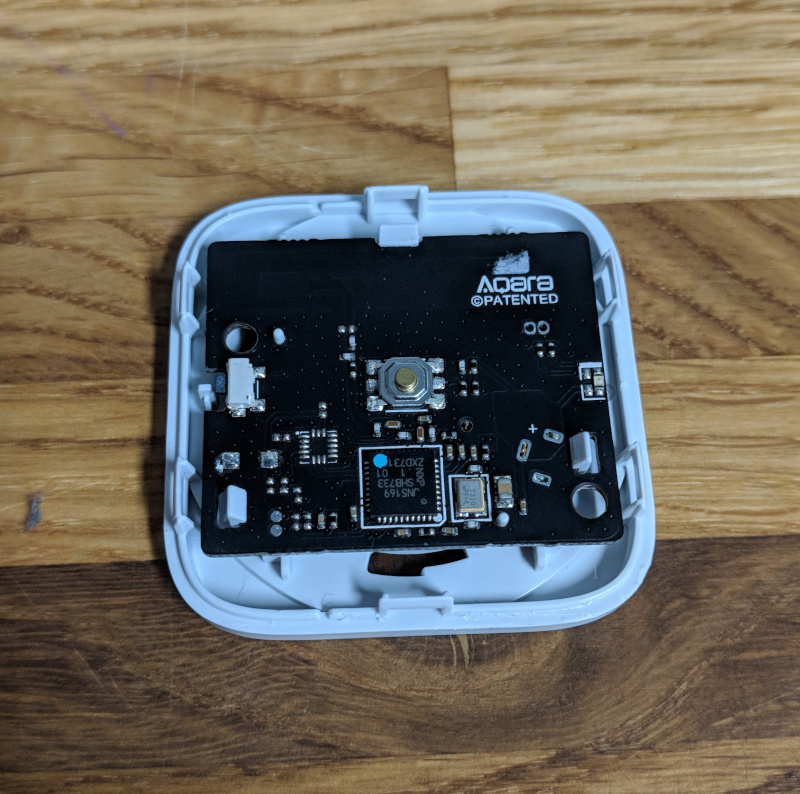
Inside

Step one was of course to open up my nice new button. Quick attack of the spudger had the case popped open and ready for a bit of probing. Now, if i was designing this board, i'd probably duplicate the button out to a test pad or pin header somewhere. Luckily the engineers at xiaomi appear to agree with me, and the header in the top right is connected directly across the input switch, score!

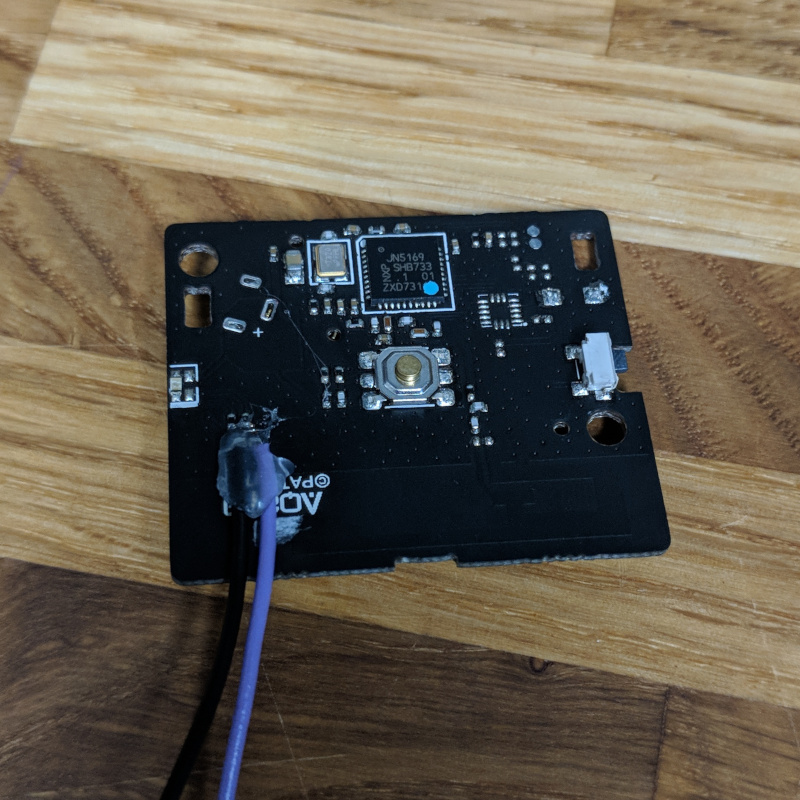
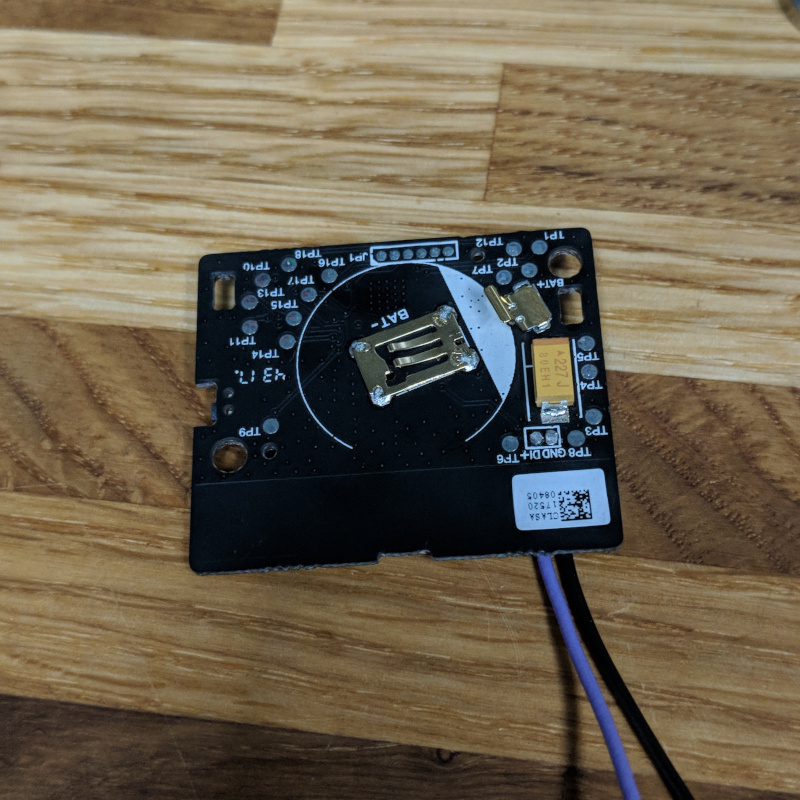
Wires to the front of the board Wires to the back of the board

I soldered a couple of wires to the board, and added some hotglue to provide a minimum of strain relief. As an aside, look at all those lovely labelled test points on the back of the board, this could make a fairly nice development board for the NXP zigbee microcontroller.

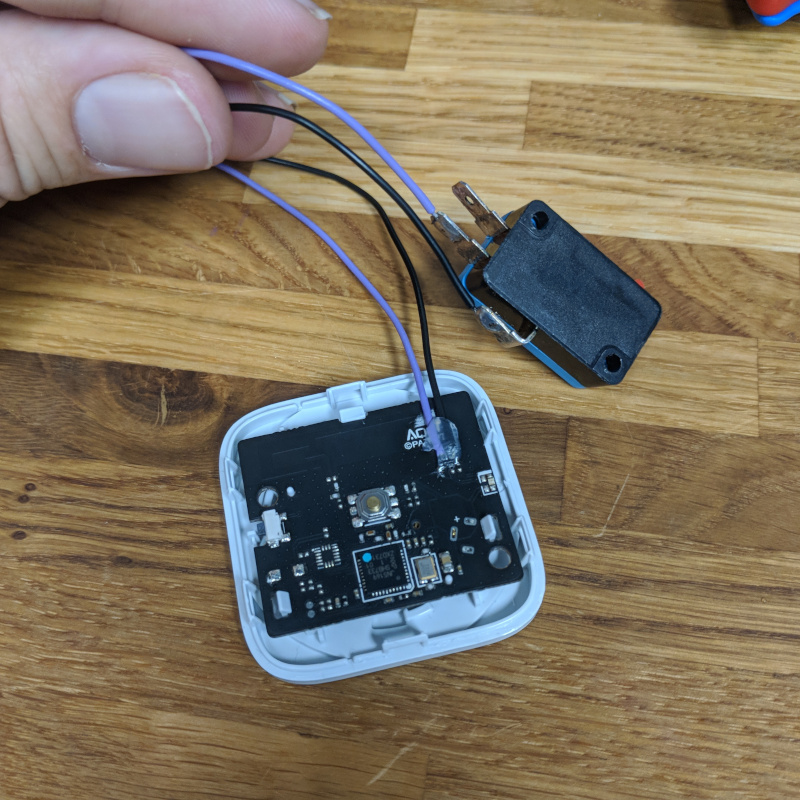
Wires to the microswitch

I wired in a microswitch to the other end of my cables, and pressing the microswitch triggers the button, yay!

Reassembled

A small amount of poking with a scalpel let me remove enough plastic from the corner of the case to feed the wire through and assemble the Aqara button.

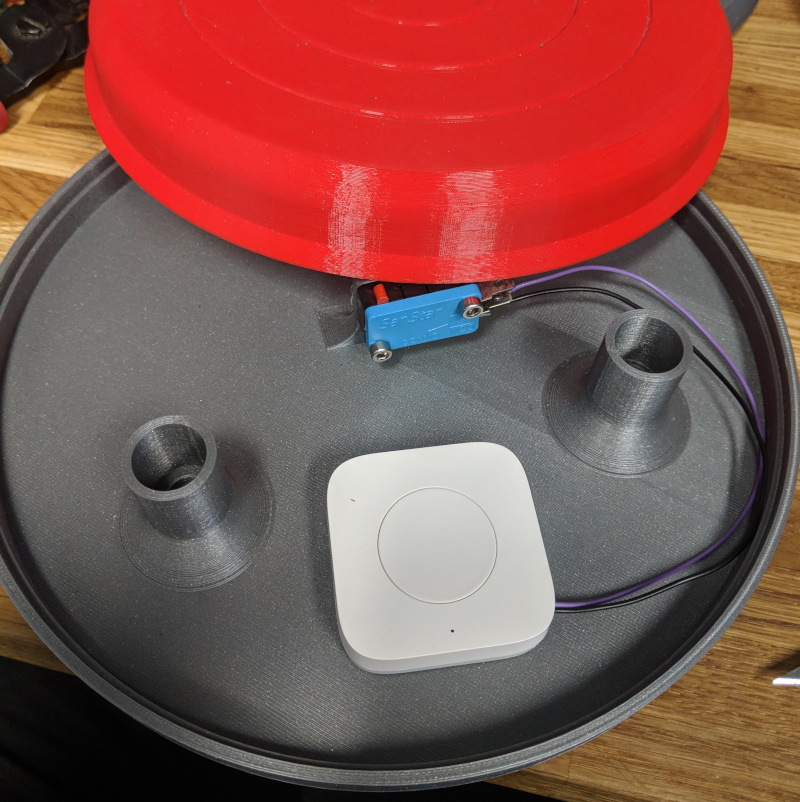
Fitted into button

Assemble into the button, and a little bit of hacking to make an automation in homeassistant, and we have a light switch for the 3d printer light!


Automatically starting a Python script at boot on Raspbian Jessie

Posted on 2016-07-06 in sysadmin

As part of the Hackspace Manchester door control system, we have a raspberry pi running a little script that checks scanned cards against a database of members and opens the door if the card is known.  This has been humming along happily for around 3 years now, until recently it stopped updating card IDs when they were changed via the webui.

This led to a bit of a bug hunt, concluding with the fact the version of openssl on raspbian wheezy was waaaaay out of date, and we'd recently updated our members system to disable insecure cyphers on the HTTPS protocol.  We fixed it by upgrading to jessie, which as a side effect completely killed the auto-start of the door opening programme. Yay?

So.  Jessie.  Systemd.  Init system is a a bit different from sysvinit, but on the whole i find it a lot more sensible.  We want to run a script as the user 'alfred' (the door entry service user).  We also want to wait until the system is booted, and the serial port is available.

My script is called alfred, so i create the following file in /lib/systemd/system/alfred.service

 1
 2
 3
 4
 5
 6
 7
 8
 9
10
11
12
[Unit]
Description=alfred
After=dev-ttyAMA0.device multi-user.target

[Service]
Type=idle
ExecStart=/home/alfred/FRED/fred/fred.py
WorkingDirectory=/home/alfred/FRED/fred/
User=alfred

[Install]
WantedBy=multi-user.target

The After= says what services need to be up before this is run. In this case, it wants ttyAMA0 to be available, along with multi-user (this is the point where you could normally log in)

ExecStart= specifies the script I will be running, WorkingDirectory= is the directory to run the thing from (as i use relative paths in my python script, i need to set this), and User= says what unprivileged user to run the script as, since you don't want to be running random things as root if at all possible!

WantedBy= says that this should be started at the same time as multi-user.target, so at the end of the boot process, at the point you could normally log in.

We can then set up our new service to start on boot, and run it for the first time:

 1
 2
 3
 4
 5
 6
 7
 8
 9
10
11
12
13
$ systemctl enable alfred
$ systemctl start alfred
No errors, so lets check the status:
$ sudo systemctl status alfred
● alfred.service - alfred
Loaded: loaded (/lib/systemd/system/alfred.service; enabled)
Active: active (running) since Wed 2016-07-06 16:42:59 BST; 30min ago
Main PID: 709 (fred.py)
CGroup: /system.slice/alfred.service
└─709 /usr/bin/python /home/alfred/FRED/fred/fred.py
Jul 06 16:42:59 alvin systemd[1]: Starting alfred...
Jul 06 16:42:59 alvin systemd[1]: Started alfred.
Jul 06 16:43:01 alvin fred.py[709]: 2016-07-06 16:43:01,577 FRED 0.7

Looks good, service is started, and we're getting some log output from it. Reboot to check everything comes up correctly and you're done!

... Though i wasnt. One gotcha I ran into is that because of the way raspbian's networking is set up, you can't get systemd to wait until after you have a network connection configured before starting the script (it will wait until the networking service is started, but not wait for the network to actually be up). This can be worked around pretty easily by setting the "Wait for network on boot" option in raspi-config, which will pause the whole boot process until it gets a DHCP lease.


Anatomy of a Scam: the tale of the £40 3D printer.

Posted on 2015-10-05 in misc

Aliexpress Screenshot

When i saw this, I thought "£40 for a 3d printer?  Including UPS shipping? This is too good to be true!"

Though thinking about it a bit more, I couldn't think of any way they could get away with the money.  Aliexpress offers full buyer protection if you buy through alipay, and money is held in escrow.  So I bought a couple to see what the dealio is. If it does arrive and its shit, just the motors would cost more then £40 to buy, and I can definitely reuse them.  I figured going into this paranoid, I might just about be able to figure it out before they run away with my money.

This morning, I got shipping confirmation, with a china post shipping code. "Wow, maybe its not a scam?" I thought. Then I received this message:

hi. friend. Because you choose courier suspended. We send you the goods by China Post Air Parcel. Give you cause delays receive the package, so we give you $15 in compensation. You may submit disputes. A partial refund of $15 agreement. We give you a refund in a timely manner. Thank you

Ok, yeah, thats a bit odd.  This is the penny dropping.

The way AliExpress works, you can open a dispute on any order for either the full, or part of the purchase price.  If the seller agrees, the refund is paid out to you right away.  But if I open a dispute for the shipping, maybe I lose the ability to open a dispute for the remainder if the item doesn't arrive? The FAQs were unclear, so I set off to AliExpress customer support:

If I open a dispute for a partial refund (for the shipping), can I then open another dispute later if the item does not arrive

No, if the dispute has been agreed the seller with partial refund, the remaining payment will be release to the seller automatically

With this, I highly suggest to please ask a full refund instead.

So there it is.  Beautiful in its simplicity.  You ask for a dispute for the shipping charges, get your £8 shipping back, and lose the ability to claim back your £32 for the rest the item when it doesnt arrive.  Since I have 40 days of purchase protection remaining, I'm going to hold off claiming a full refund for a couple of weeks, and I'll update here if I turn out to be wrong and something does arrive!

Update!

Another message is being sent to those of us who have ignored the first message, or replied that the refund is not necessary:

Friends. Goods are in transit. Do not worry. We give you a refund of compensation today. Tomorrow no longer compensate, please submit the dispute in a timely manner, thank you

Ahh, a time limit! Best get the refund quick, otherwise they wont offer it anymore! I've received this second message, as have others. I'm guessing it wont be long until aliexpress close their account, so they've gotta try and get as much cash out asap.

Update!

Just got an email from aliexpress:

Your order --REDACTED-- has been frozen due to suspicious seller activity.

We have suspended this seller’s account because we detected unsafe trading activities. All of your pending orders with this seller have been frozen for your security.

We have asked this supplier to provide supporting evidence, such as shipping documents and qualification certificates. If the supplier is unable to provide the evidence or if the evidence is insufficient, we will close the order and process the refund for you within 5 business days (In case of certain circumstance, the processing period may be extended).

We apologize for this inconvenience. At AliExpress we are committed to ensuring you enjoy a safe shopping experience. We will continue striving to improve. Your understanding and cooperation are highly appreciated, if you have any question or suggestion, please click here

Your understanding and cooperation are highly appreciated.

Sincerely,

AliExpress Trade Security Department

I'm fairly unsurprised by this, hopefully the refund will be forthcoming fairly quickly.

Final Update

Your Order No:-REDACTED- has been closed because the supplier did not provide necessary evidence. The payment will be refunded to you within 7-10 working days.

AliExpress strives to continuously improve our trading environment. Thank you for your understanding and continued support.

Sincerely,

AliExpress Trade  Security Department

And its over. This experience has massively reaffirmed my confidence in aliexpress' customer services and payment systems. Other sales websites should take notice!


Setting up a self-healing SSH tunnel for Raspberry Pi using Debian.

Posted on 2015-04-30 in sysadmin

I use quite a few raspberry pi's in locations that dont have the ability for me do incoming SSH to update / reboot / maintain them.  This is how i set up a reverse SSH tunnel to them, allowing me to access them from anywhere with internet access!

If the site has a proxy, first you'll need to install a proxy puncher to allow you to bypass it.

1
$ sudo http_proxy="http://proxy.ip.address:port" apt-get install corkscrew

Then install screen. Screen allows you to start a process running 'detached' from your current shell, so you dont have to be logged in to keep the tunnel up.

1
$ sudo apt-get install screen

Create a user for your ssh tunnel. You could just use the default pi user, but i prefer to use a dedicated tunnel user.

1
$ sudo adduser --system tunnel

Create tunnel config

1
2
$ sudo -u tunnel mkdir /home/tunnel/.ssh
$ sudo -u tunnel vim /home/tunnel/.ssh/config

Paste the following into the file. This forwards port 22 (ssh) and 80 (http) on the raspberry pi to ports 8022 and 8080 on your VPS.

1
2
3
4
5
6
7
8
9
ProxyCommand corkscrew 127.0.0.1 3128 %h %p
Host tunnel
  Hostname your.vps.hostname
  Remoteforward 8022 localhost:22
  Remoteforward 8080 localhost:80
  Port 443
  User tunnel
  ServerAliveInterval 10
  ServerAliveCountMax 3

NOTE: If you are not using a proxy, remove the corkscrew line and the port 443 line. The port 443 line above is only needed if you are behind a proxy and firewall that disallows port 22 outgoing. I have set up my SSH daemon on the VPS to listen to port 443 (the https port) as well as the normal 22 as this will manage to punch its way through most proxies.

The ServerAliveInterval and ServerAliveMax variables above basically say "send a packet across the tunnel every 10 seconds. If you don't get anything back after 3 tries, close the tunnel"

The above config also assumes you have set up a tunnel user on the machine you are SSHing to. If not, either create a tunnel user the same way we did above, or change the user line in the config to the username you will be using on the VPS side.

Generate your RSA key and upload to the VPS

1
2
3
4
$ sudo -su tunnel
$ export HOME=/home/tunnel
$ ssh-keygen
$ ssh-copy-id tunnel

At this point, you should be able to SSH to tunnel without typing in any passwords etc.

1
2
$ ssh tunnel
Linux thinkl33t 3.2.0-4-686-pae \#1 SMP Debian 3.2.65-1+deb7u2 i686

Set up our shell scripts to automatically start the tunnel.

 1
 2
 3
 4
 5
 6
 7
 8
 9
10
11
$ sudo -su tunnel
$ mkdir /home/tunnel/bin
$ echo 'PATH="\$HOME/bin:\$PATH"' | tee /home/tunnel/.bashrc
$ echo '\#!/bin/bash' | tee /home/tunnel/bin/monitor\_tunnel.sh
$ echo 'APPCHK=\$(screen -ls | grep -c tunnel)' | tee -a /home/tunnel/bin/monitor\_tunnel.sh
$ echo 'if \[ \$APPCHK = "1" \]; then' | tee -a /home/tunnel/bin/monitor\_tunnel.sh
$ echo ' echo "Starting SSH tunnel"' | tee -a /home/tunnel/bin/monitor\_tunnel.sh
$ echo ' screen -mdS tunnel ssh -N tunnel' | tee -a /home/tunnel/bin/monitor\_tunnel.sh
$ echo 'fi' | tee -a /home/tunnel/bin/monitor\_tunnel.sh
$ echo 'exit' | tee -a /home/tunnel/bin/monitor\_tunnel.sh
$ chmod a+x /home/tunnel/bin/monitor\_tunnel.sh

The above script checks for an already open screen session with the name 'tunnel'. If it doesn't exist, it creates it. If it does exist it just ends. The screen session is launched in a detached state (in the background), and will automatically end when the SSH tunnel falls over.

Set up the crontab to automatically run our monitoring script once a minute

1
$ echo '\*/1 \* \* \* \* /home/tunnel/bin/monitor\_tunnel.sh' | crontab

Your tunnel should come up shortly, woo!

To test it out, from your VPS, type

1
2
3
$ ssh localhost -p 8022
parag0n@localhost's password:
Linux thinkl33t 3.2.0-4-686-pae \#1 SMP Debian 3.2.65-1+deb7u2 i686

Brill, you can now SSH in from your VPS... But by default SSH tunnel ports are only available from localhost, so you'd have to log into your VPS every time you wanted to get into the pi. So, lets edit the SSH config file on your local machine!

1
2
3
4
Host pi
  Hostname localhost
  Port 8022
  ProxyCommand ssh your.vps.hostname nc %h %p

This will allow you to type in ssh pi on your local machine, and will automatically ssh into your VPS, then SSH into localhost. Sorted.


Project - Lil' Buggers

Posted on 2014-05-12 in makes

Lil Buggers

We like to do occasional workshops at the Hackspace, so when we were asked to make something 'bug themed' for a workshop, we jumped on it.   The first thought we had was to make up some bug-shaped PCBs with a circuit to flash LEDs, and run a soldering workshop.  When we found out the workshop was a week away, we panicked a little, as that's not really enough time to get PCBs manufactured at a sensible price.

We decided instead to make little laser cut bugs with LED eyes, as they can be made with easily available materials, and infinitely customised.

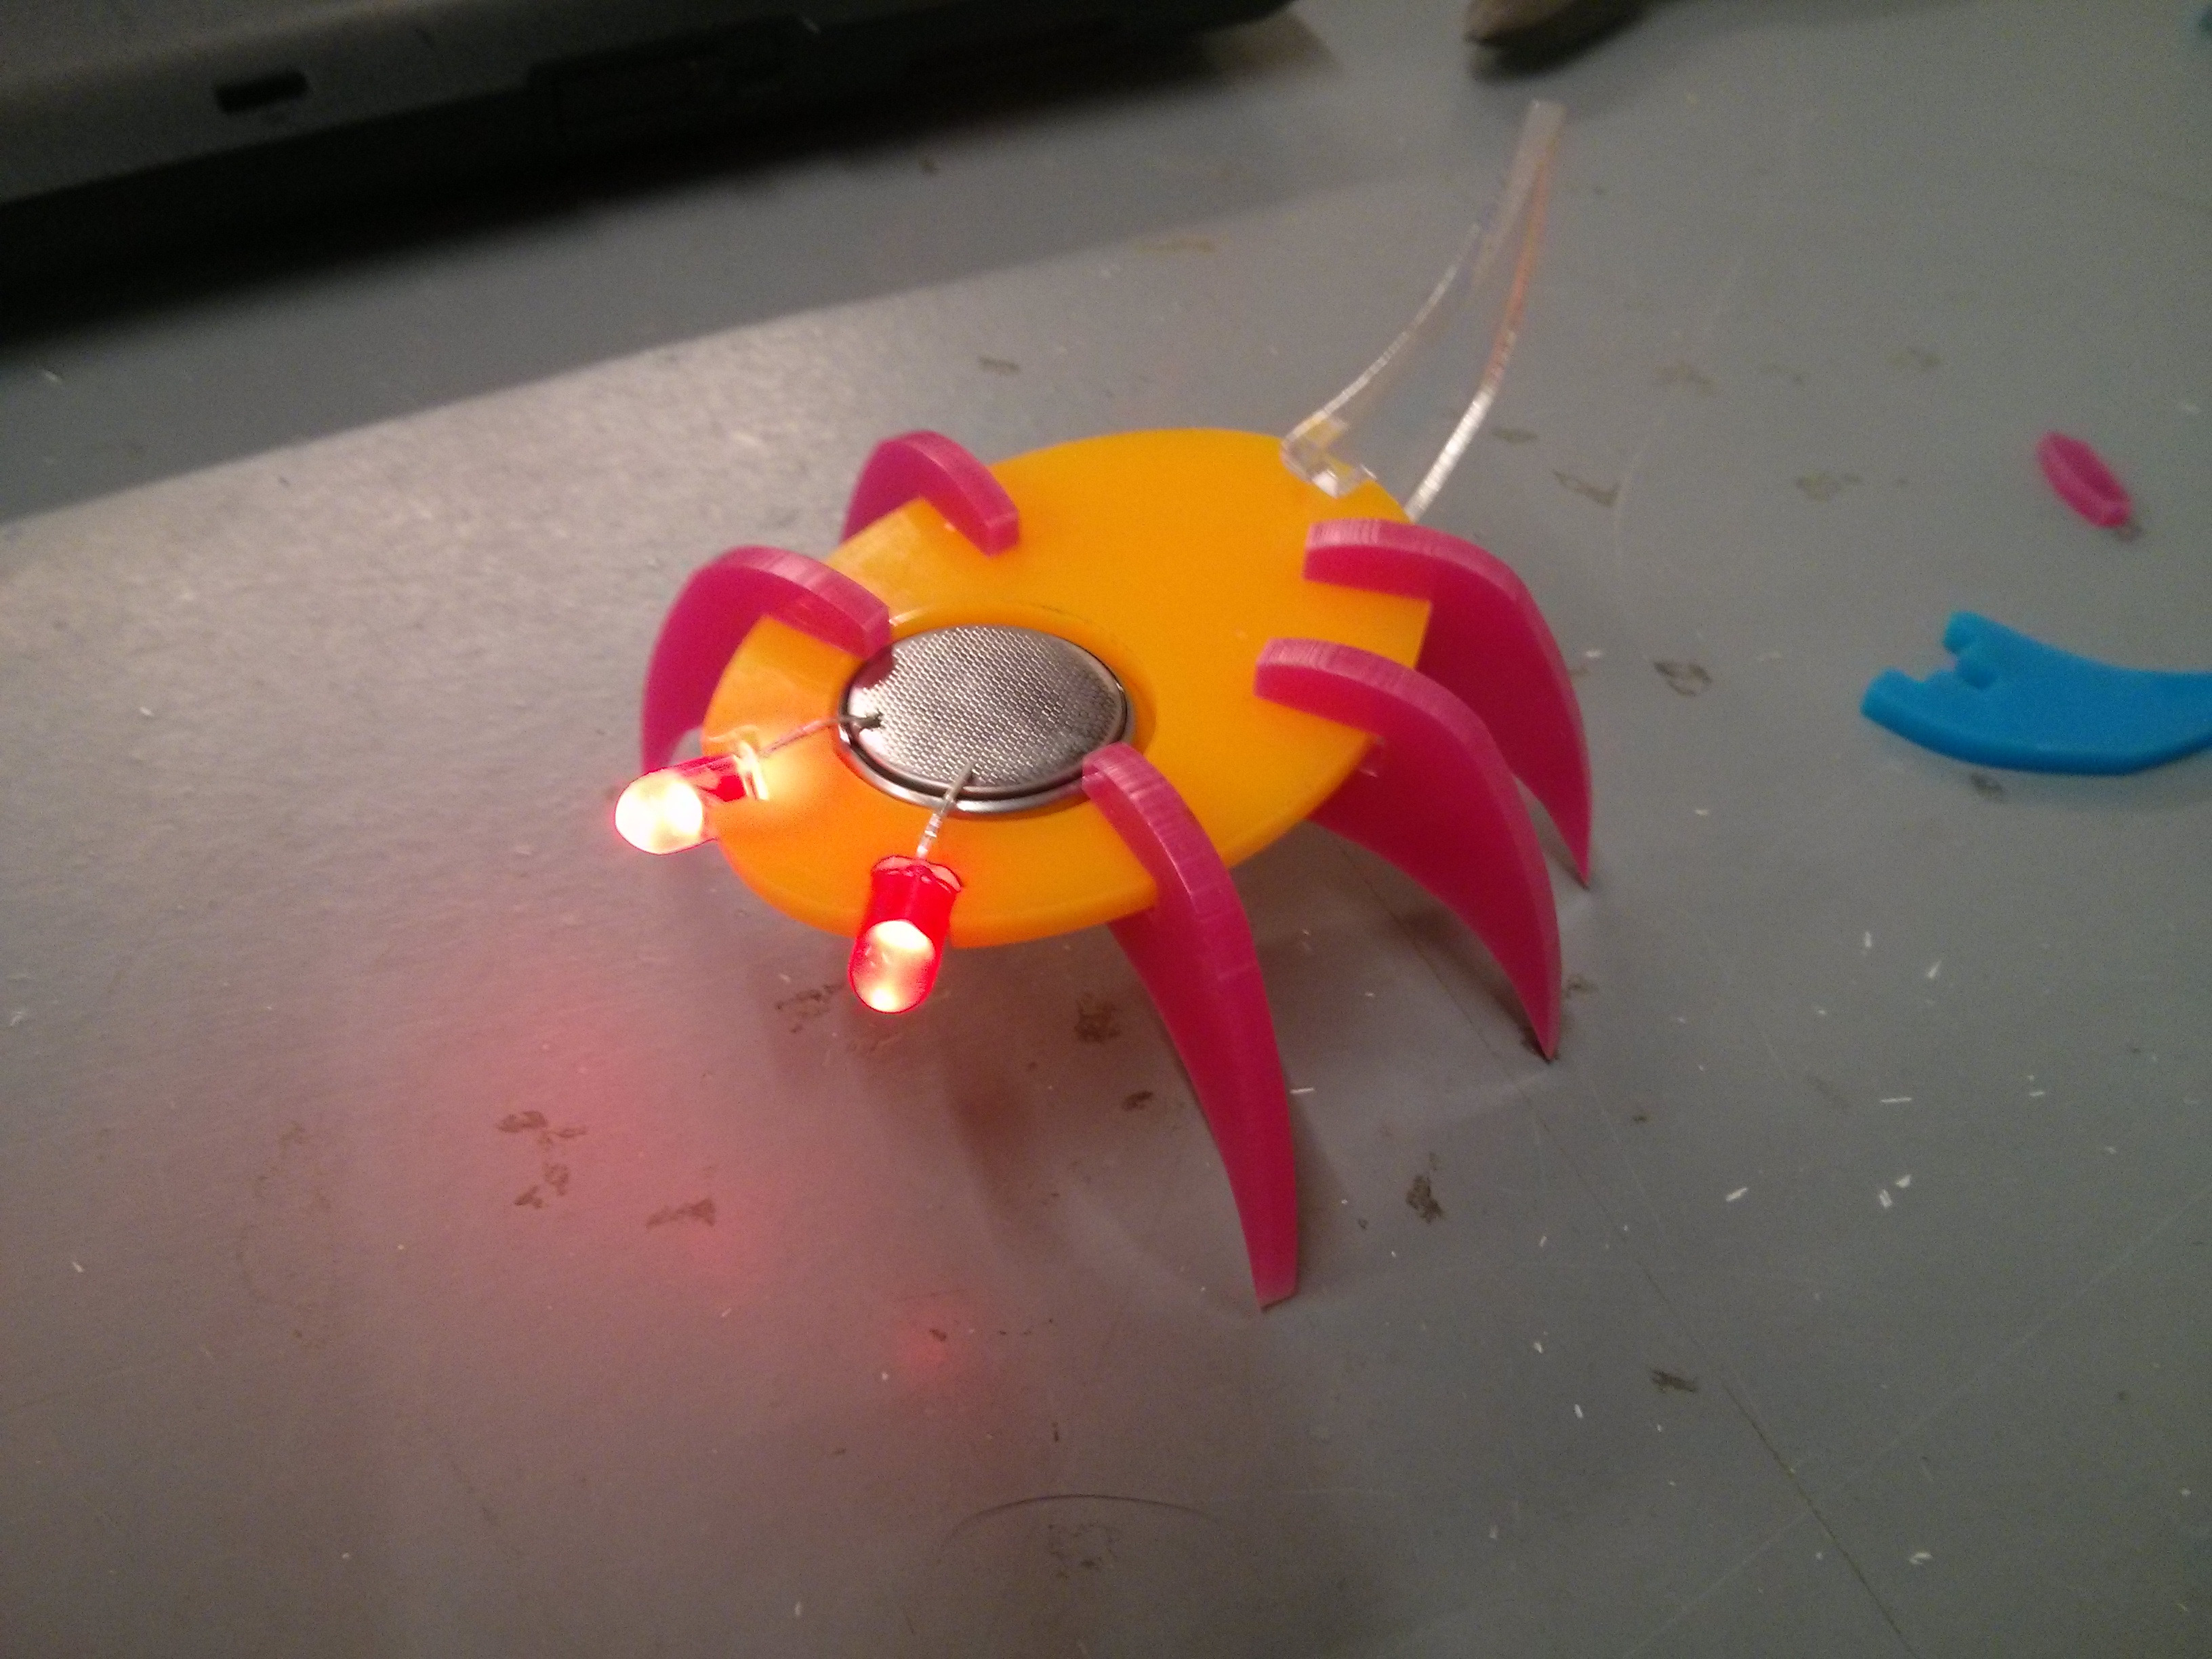
Step one was to choose a material.  Our first experiments were with acrylic.  I whipped up some designs for 'joints', which would friction fit onto the side or top of a 'body'.  I attached these to a curved path in inkscape for the legs, and bug #0 was born!

Bug 0

Bug #0 had a couple of issues, mainly due to the material choice.  Acrylic thicknesses can be a bit variable, the tolerance can be as wide as ±10%, and it is fairly brittle.  the combination of these two issues caused at least one broken leg (hence #0 having 5 legs!).

We decided to have a go at laser MDF instead.  Laser MDF is basically MDF made with a glue that is less harmful to people and laser cutters than regular MDF.  It has the advantage of being very dimensionally accurate (our 3.2mm MDF was measured at 3.21mm), and having a bit of bend before it breaks.

Bug 1

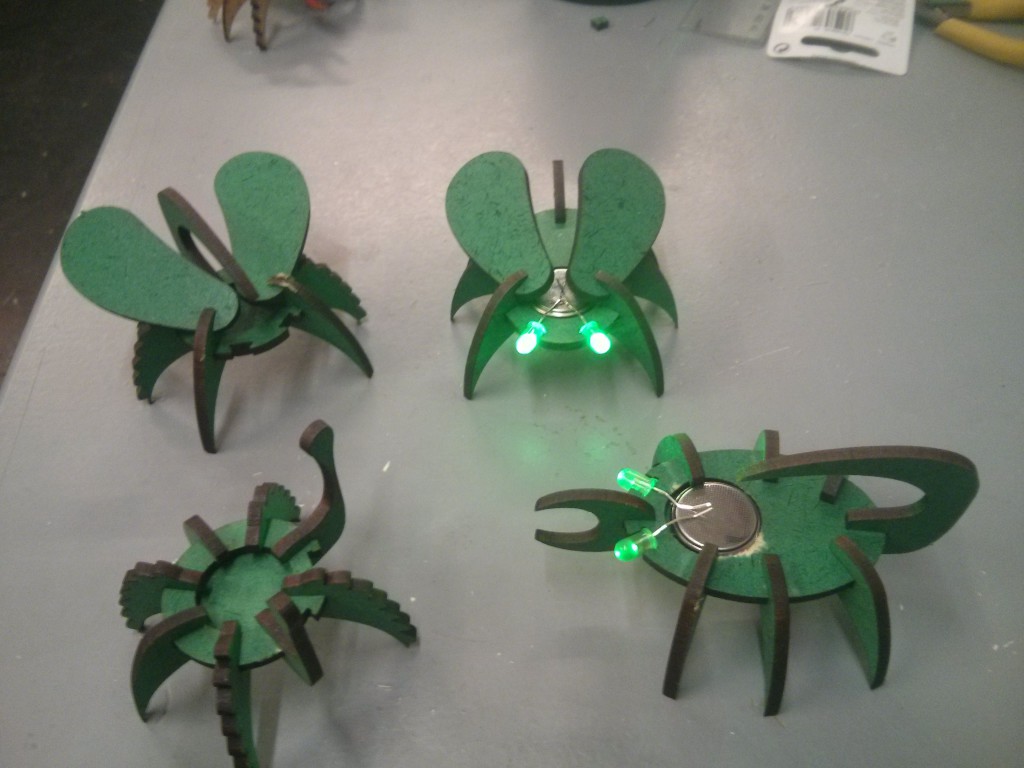
Bug #1 was born.  It assembled a lot easier than #0, and has cool looking scorched edges.   At this point I started designing some add-on parts to allow attendees to customise their bugs, including wings, tails, hairy legs, and mandibles.

The only issue with #1 was losing the wide range of colours available from acrylic.  However, I had a flash of inspiration, and gave a sheet of laser MDF a light coat of red spraypaint.   This dries fast, and gives an awesome splash of colour.

Bug 2   Bug #2 is alive!  This time sporting a lovely pair of wings and some antennae. #2 was done with just one side of the wood painted, which gives a cool effect. depending on what side of the bug you're looking at.

Then things got a bit silly...

Bugs

We now have a swarm of these delightful Lil' Buggers invading the hackspace.  With a magnet and a dab of hotglue they'll stick to anything metallic, and their LED eyes last for a couple of days on a coin cell.