TiLDA for Wearable Electronics
Posted on 2016-08-03 in emf
Did you know that as well as being an awesome internet-connected, python-powered portal to nirvana (OK, one of those may be a lie), your badge is also a rad wearables controller?
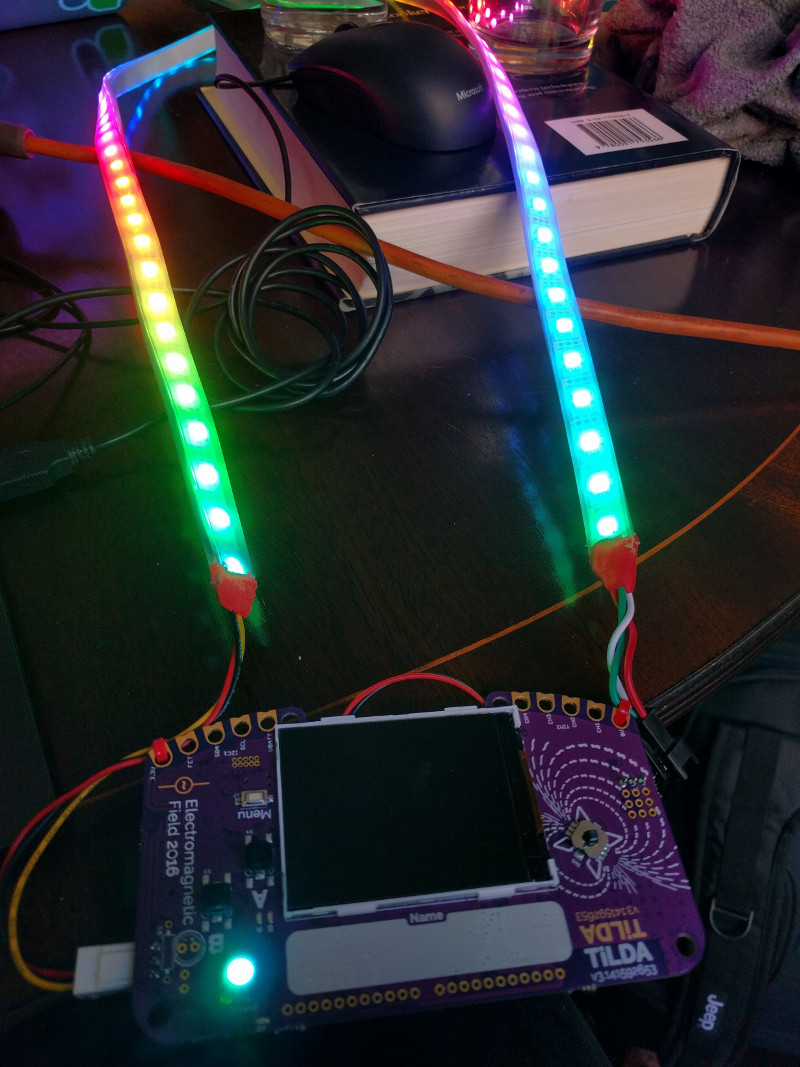
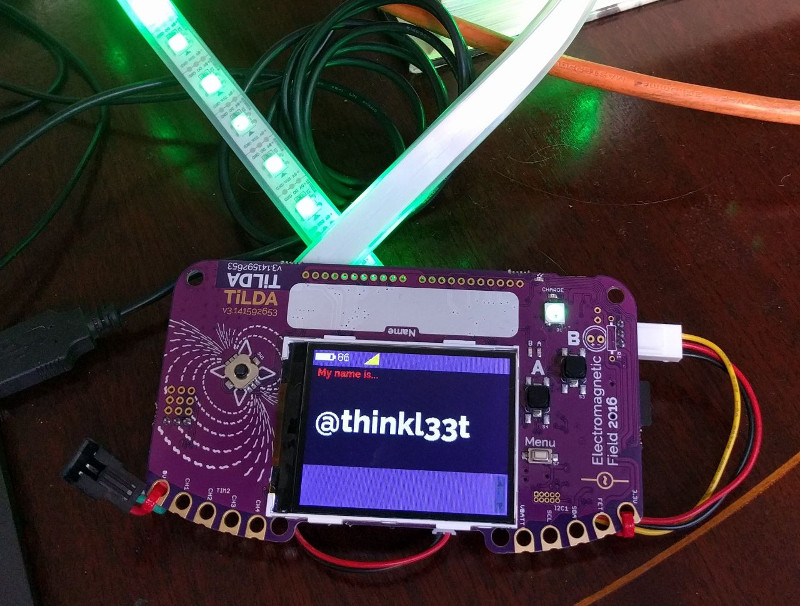
At badge HQ, we love flashy LEDs, and we love sewing them to ourselves for no apparent reason. That's why each badge has support for attaching and driving a string of Neopixel / WS2812 LEDs up to X LEDs long.
If you already have some neopixels, you'll need to add a three-pin connector to the end of the string for connecting to the badge. The pinout is a servo-style pinout, with the +v in the center, which makes it more difficult to explode things if you plug it in backwards!
![]()
I would suggest using a right-angled connector, and having your wire go off the side of the badge. That way it isn't sticking out or stabbing you in the chest.
NOTICE: Unfortunately, the badges we've made for the event have the onboard neopixel fitted backwards (oops!), so unless you want to have a go at rotating it (we can help with that at the Badge Tent), you cant use the onboard header. Luckily, CH2 on the Servos connector block is also able to be used for neopixels, so you can solder the connector there instead.
The central V+ pin is at battery voltage when running from battery, so varies between 4.2 and 3.6 volts depending on how flat your battery is. We've tested this with a string of 5V neopixels, and it is enough to power them up fine. However, if you are worried about your battery running out too fast, or want to drive more neopixels than the badge can handle, you can plug a USB battery pack into the badge, and the LED strip will be provided with a full 5V.
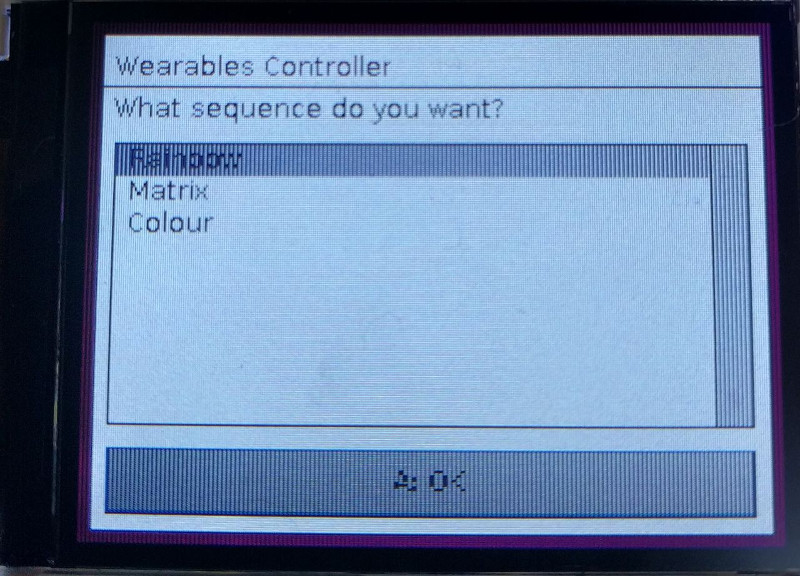
The App
OK, so thats the hardware, now for the software. Step one is to load up the Wearables from the App Library. As soon as you reboot, the neopixel on your badge (or the first on your strip) should start cycling through the colour wheel.
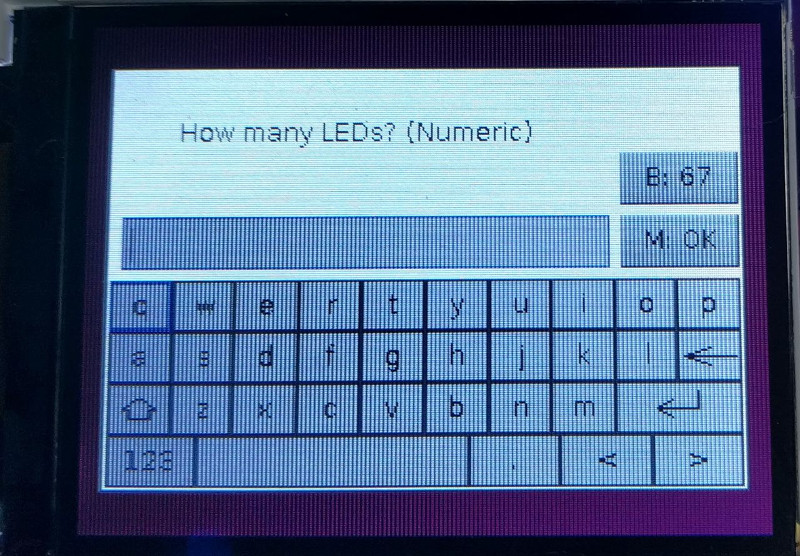
What we need to do is tell the app what sequence to run, and how many LEDs you have connected to your badge. Lets try the rainbow:
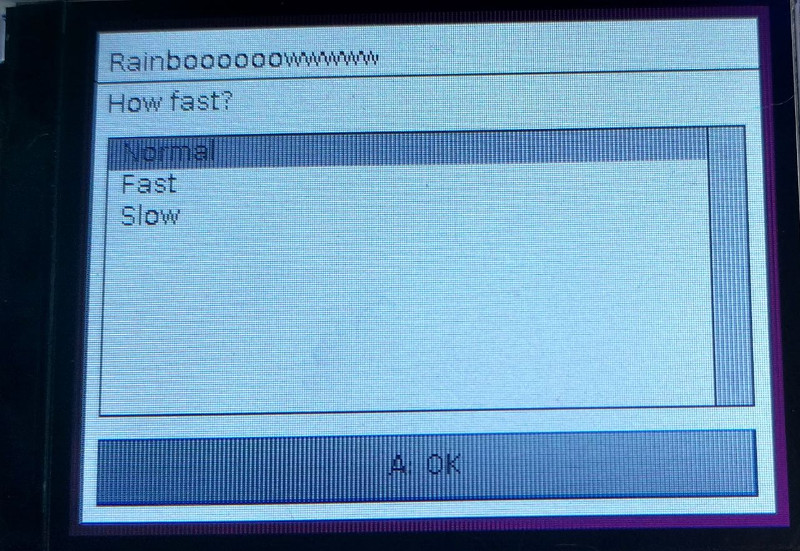
Rad.
Note that once you've set up the number of LEDs connected, you can just press B to skip that screen in the future, it'll keep the setting.
Matrix next. This doesnt need anything extra configuring, and shows a green flickery pattern like on the film (which i'm informed is now 17 years old, what?!):
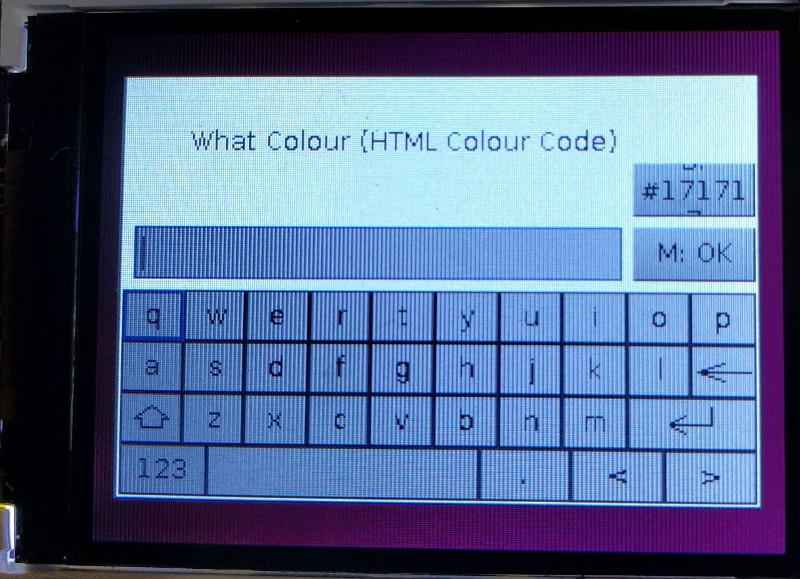
And lastly, Colour displays a single colour so you can make everything pink! You need to enter a HTML colour code, this is ff00ff:

If you want to add any extra sequences, code for the wearables app is available at https://github.com/thinkl33t/TiLDA-Wearables . Just dump it on your badge at apps/wearables/ I'll accept pull requests if you add any extra sequences, so get making!