3D printing - Bandsaw Fence
Posted on 2013-03-21 in makes
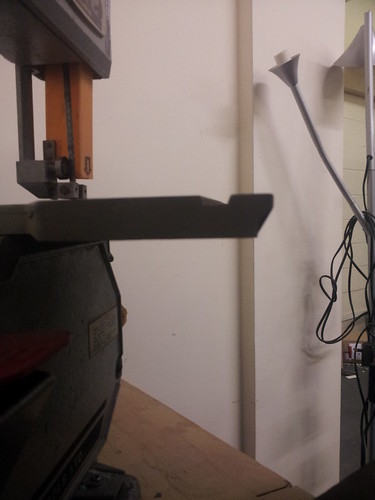
I spent some time earlier in the week getting the bandsaw at Hackspace Manchester working, so now its cutting again! The main problem with the bandsaw is cutting straight, as it was an ebay purchase it diddnt come with a fence, so there was nothing to run the cut material against. This model of bandsaw hasnt been made in around 30 years, so trying to buy a new one will be impossible, and ebay is too much hard work.
Though we do have a 3d printer... and a workshop. Idea!
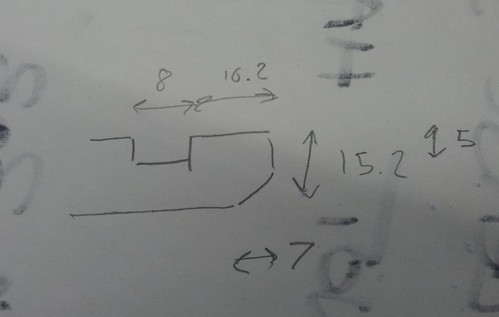
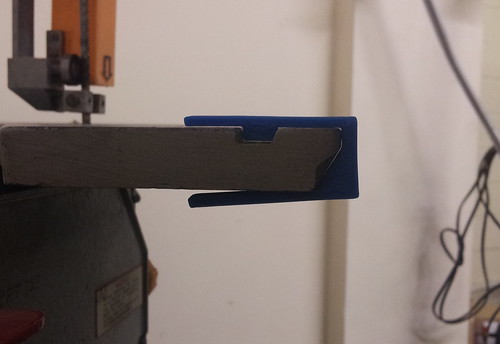
Step one was to have a look at the bandsaw. It has a channel running along the front , so I took some measurements to see what I was working with.
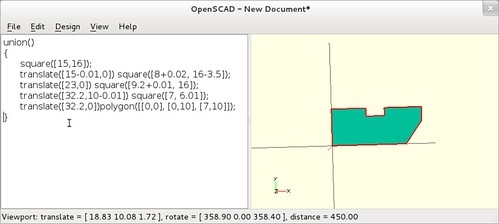
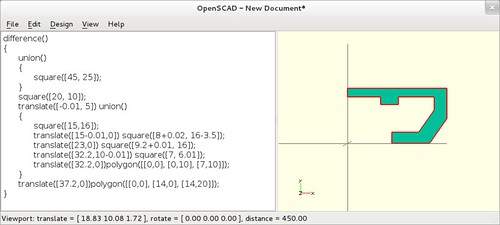
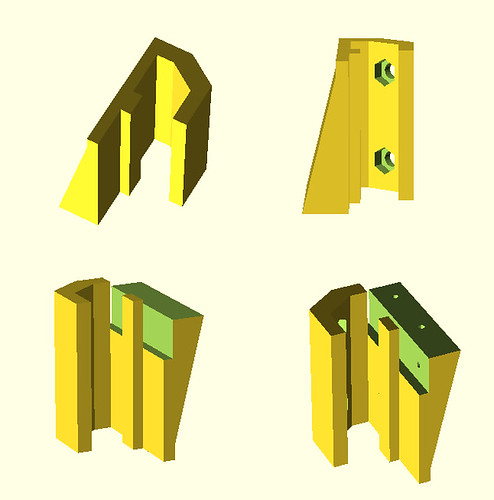
So, i had the measurements, it was time to take to my CAD software and design something to fit in the channel. My choice for this is OpenSCAD. I used it to first create the shape of the channel, then to carve this shape out of a block.
I extruded this to a few mm wide, then printed it to test. There was a bit of tweaking needed to get it to fit exactly, so i ended up doing 4 iterations with the sizes tweaked slightly.
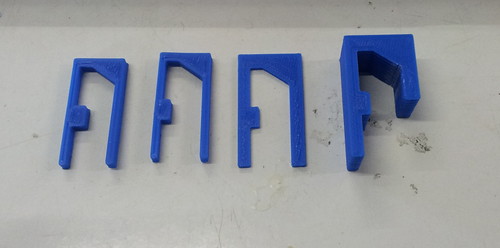
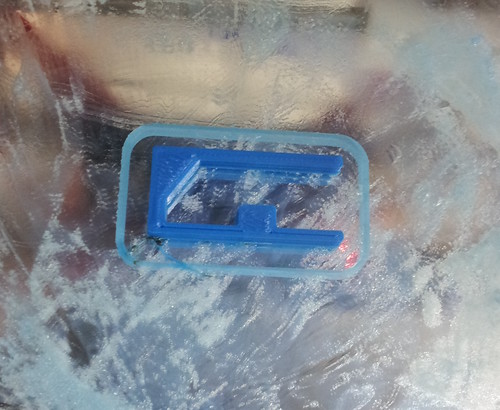
Once i had one that fitted, i printed it out extruded to 20mm to check it would fit and slide correctly.
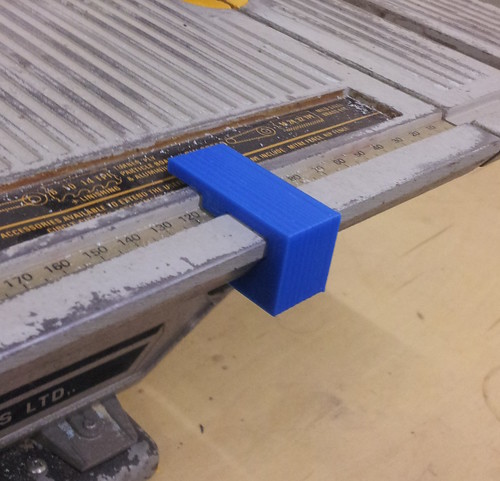
It did, so i moved onto designing the actual fence. Step one was to cut some aluminium extrusion to size, and measure it. A month or so ago I had managed to womble a nice straight piece of 16mm x 16mm 3.2mm thick L channel, which was pretty much the perfect size. I cut this to size, and modelled it in openscad.
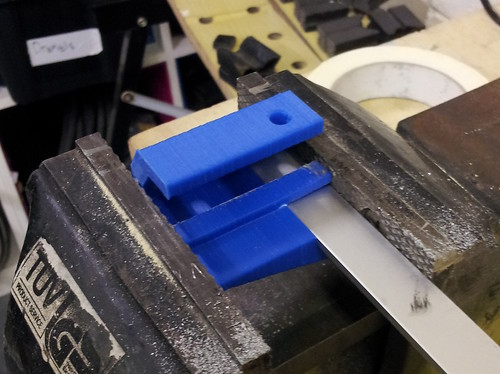
The actual cad modelling took a couple of hours of tweaking, but i the above picture shows the basic steps.
First off i extruded my clamp to 50mm wide, and added a wedge to the side of it. 50mm gives enough width for it to sit in the runner, and counteract twisting force from the back of the fence being pushed on. The wedge is to give support to the top part of the L channel.
Second, I added two captive nuts and holes for M5 bolts. Mainly because we have a massive bag of M5 hex-head bolts that are perfect for printed thumbscrews. Theoretically i could have threaded into the ABS directly, but i felt this wouldnt last, so embedding a nut seemed like the best option.
Third, i carved out the hole for the L channel. This leaves a bit of an odd shaped unsupported piece, which may be weak. Because this piece will be in the channel, i decided to leave it, as it'll make measuring up on the built-in ruler more accurate.
Lastly, i added some pilot holes for attaching the aluminium to the 3d printed part. i decided to use 3mm x 12mm self tapping screws for this, because i had them on hand, and they can be countersunk fairly easily.
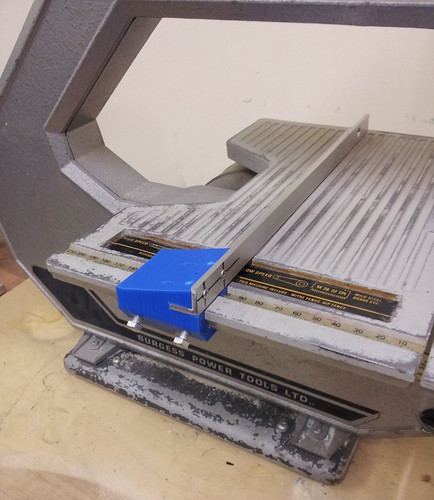
I test-assembled the whole thing in the vice, it fitted nicely in the channel, so it was ready for connecting together. I marked, center punched, drilled and countersunk the holes for the 3 screws that hold the whole thing together. Add some screws and we're sorted!
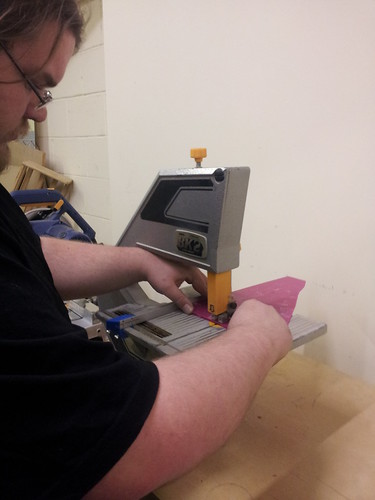
Of course, i had to do a test cut at this point, so some of the scrap acrylic pile was chopped into little strips.
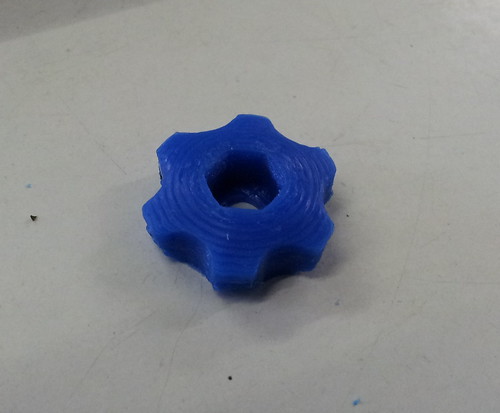
Woohoo, it worked! All it needed to be complete is some knobs. So i headed over to thingiverse to find a knob that'll fit nicely over an m5 nut... and found nothing useful. No worries, i just OpenSCADdded one up.
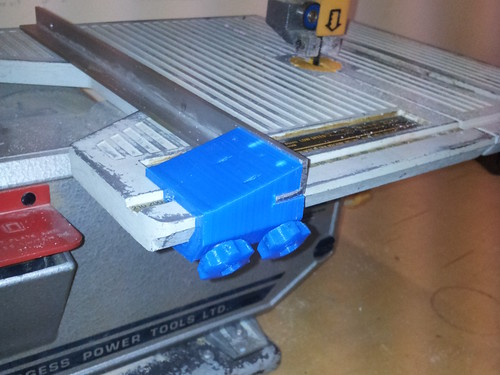
So there it is, a useful thing i've made on the 3d printer that wasnt a part for a 3d printer!
Source files (stl, openscad) are available on My GitHub